Recordings
There are three types of recordings in Viseron: event recordings, continuous recordings and manual recordings.
Event recordings
Event recordings are triggered by events such as motion detection or object detection. The recordings are saved to disk and can be viewed in the web interface on the Events tab on the Events page.
Configuration
The config option trigger_event_recording: true instructs Viseron to start recording when the event is detected.
Example configuration to record when detecting a person:
darknet: # or any other object detector component
  object_detector:
    cameras:
      camera_one:
        fps: 1
        scan_on_motion_only: false
        labels:
          - label: person
            confidence: 0.7
            trigger_event_recording: true
By default, event recordings are stored for 7 days. This can be changed by setting retention rules.
The trigger_event_recording option is only available for motion and object detectors.
Viewing event recordings
To view event recordings, go to the Events tab on the Events page. Here you can see all events that have been detected and recorded.
Clicking on one will seek to the time of the event.
If you see a snapshot instead of a video when you click the event, it means that the video is no longer available. Tune your retention rules to keep the recordings longer.
Filters
Various types of filtering can be applied:
-
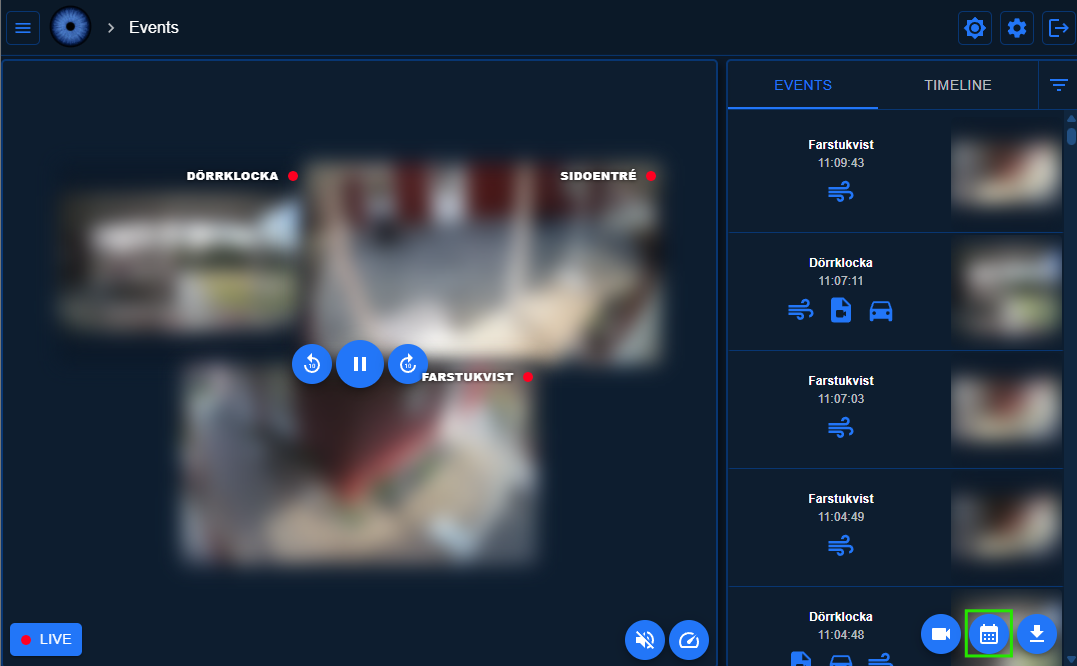
Any number of cameras can be selected by clicking on the Cameras button in the bottom right.
Cameras Button (highlighted in green)

-
You can filter by date by clicking on the date button in the bottom right.
Date Button (highlighted in green)
-
You can also filter by event type, such as motion or object detection. The filter menu is located next to the Events/Timeline tab selector.
Event type filter demo
Grouping�
Events from the same camera that are within 2 minutes of each other are grouped together.
If you want to group adjacent events from different cameras, you can select the Group Cameras option in the filter menu.
The filter menu is located next to the Events/Timeline tab selector.
Continuous recordings
If configured, continuous recordings are always running and stored to disk. The recordings can be viewed in the web interface on the Timeline tab on the Events page.
Configuration
To enable continuous recordings, all you need to do is set retention rules since the default value of continuous_recording is true.
There are several ways to set retention rules. See the retention rules section for more information.
Example configuration to record continuously:
ffmpeg: # or any other camera component
  camera:
    camera_one:
      name: Camera 1
      host: !secret camera_one_host
      path: /Streaming/Channels/101/
      username: !secret camera_one_username
      password: !secret camera_one_password
      recorder:
        continuous_recording: true  # Not needed since it is the default, included for clarity
        continuous:  # Example of setting a max size of 10 GB for this individual camera
          max_size:
            gb: 10
Viewing continuous recordings
To view continuous recordings, go to the Timeline tab on the Events page. Here you can see all continuous recordings that have been recorded.
To seek to a specific point in time, you simply click on the timeline. The timeline will show you the recordings for all cameras that are selected, if video is available.
The Activity Line visually represents the activity detected by the cameras over time, helping to quickly identify periods of interest.
Activity Line explanation
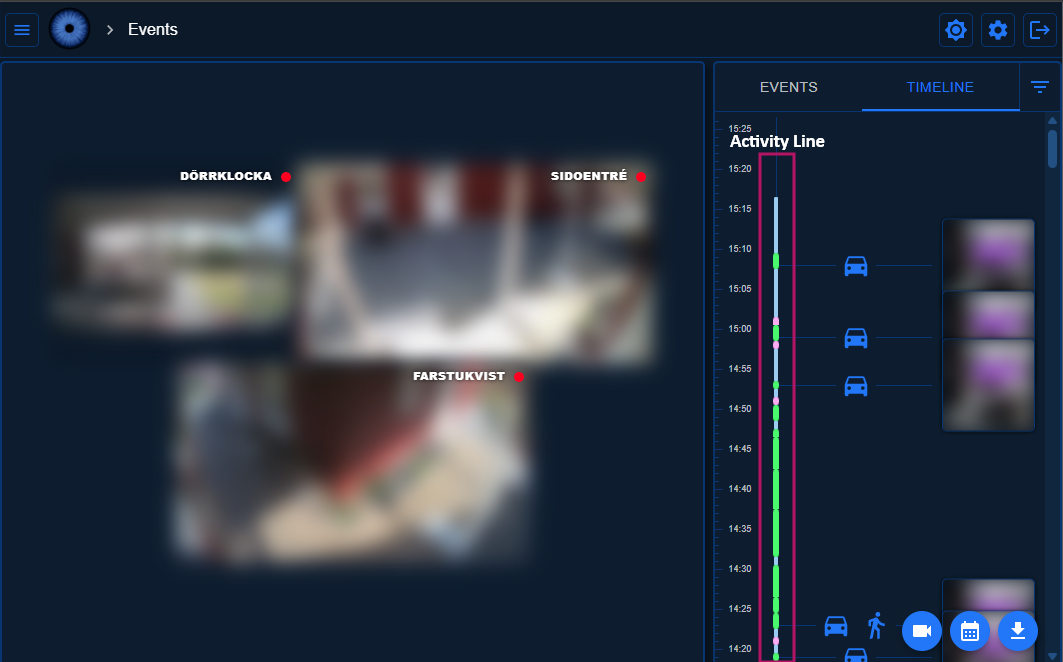
Activity Line colors:
- Slim dark blue: No activity detected, and recorded video is not available.
- Thick light blue: No activity detected, but recorded video is available.
- Thick pink: Motion detected.
- Thick green: Event recording is available.
Filters
The same filters as for event recordings can be applied to continuous recordings.
Start/stop (arm/disarm) a camera
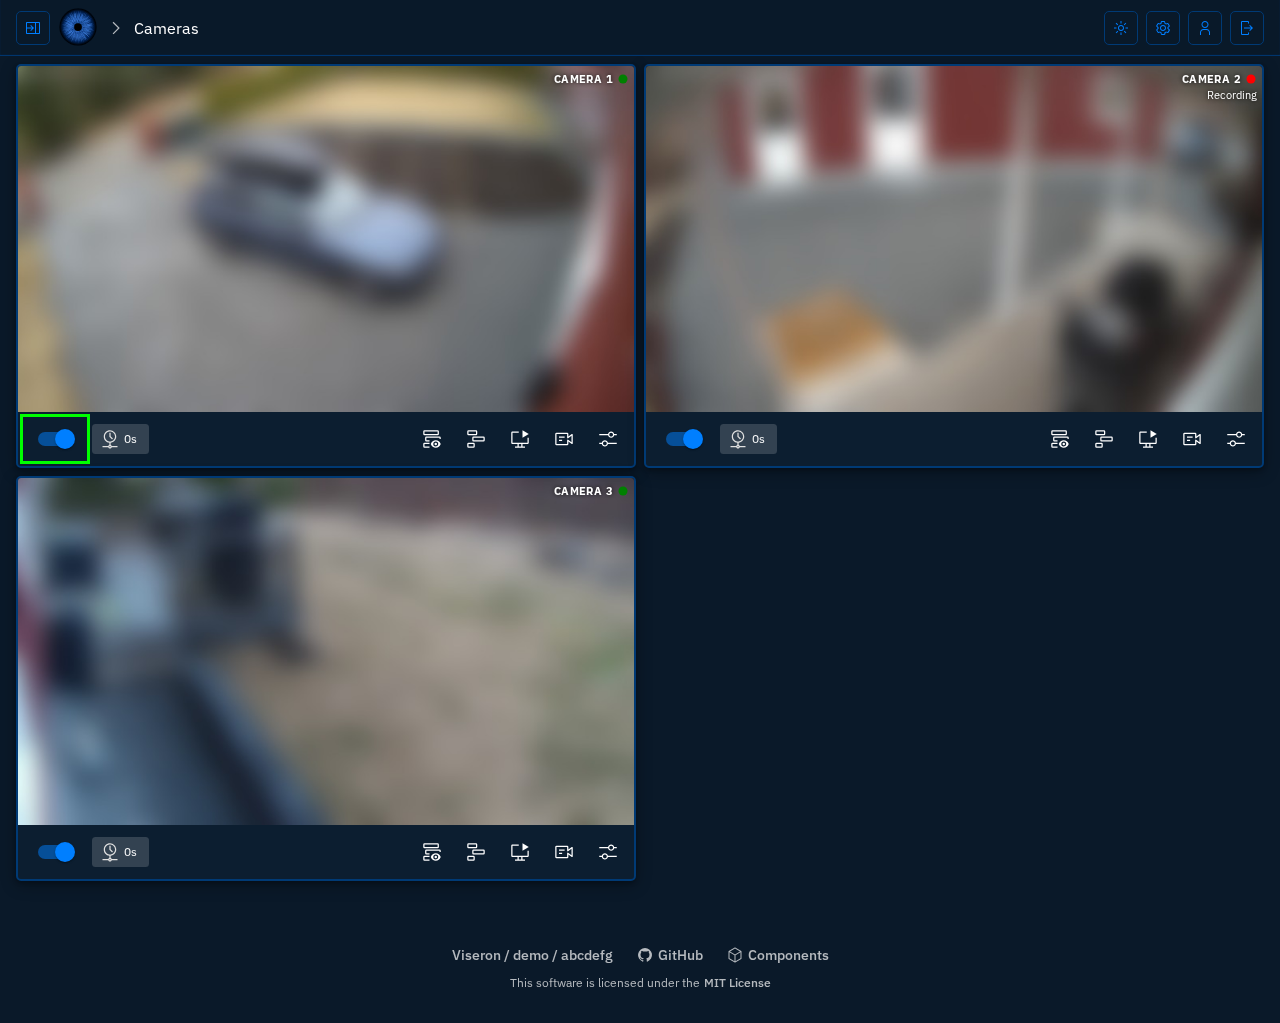
You can start or stop (arm or disarm) a camera by clicking the Start Camera / Stop Camera toggle switch on the camera card on the Cameras page.
Turning the camera off stops the camera stream and processing.
While it is turned off, no recordings will be created and it will not consume any resources.
Camera Start/Stop Toggle (highlighted in green)
Manual recordings
Manual recordings can be started and stopped on-demand in multiple ways:
- Using the web interface
- Through the REST API
- The Telegram component
- The MQTT component
Manual recordings run until stopped or their given duration has passed, but will never exceed max_recording_time.
Web interface
To start a manual recording from the web interface, go to the Live View page and click the Start Recording button in the camera controls.
Record button (highlighted in a green circle)
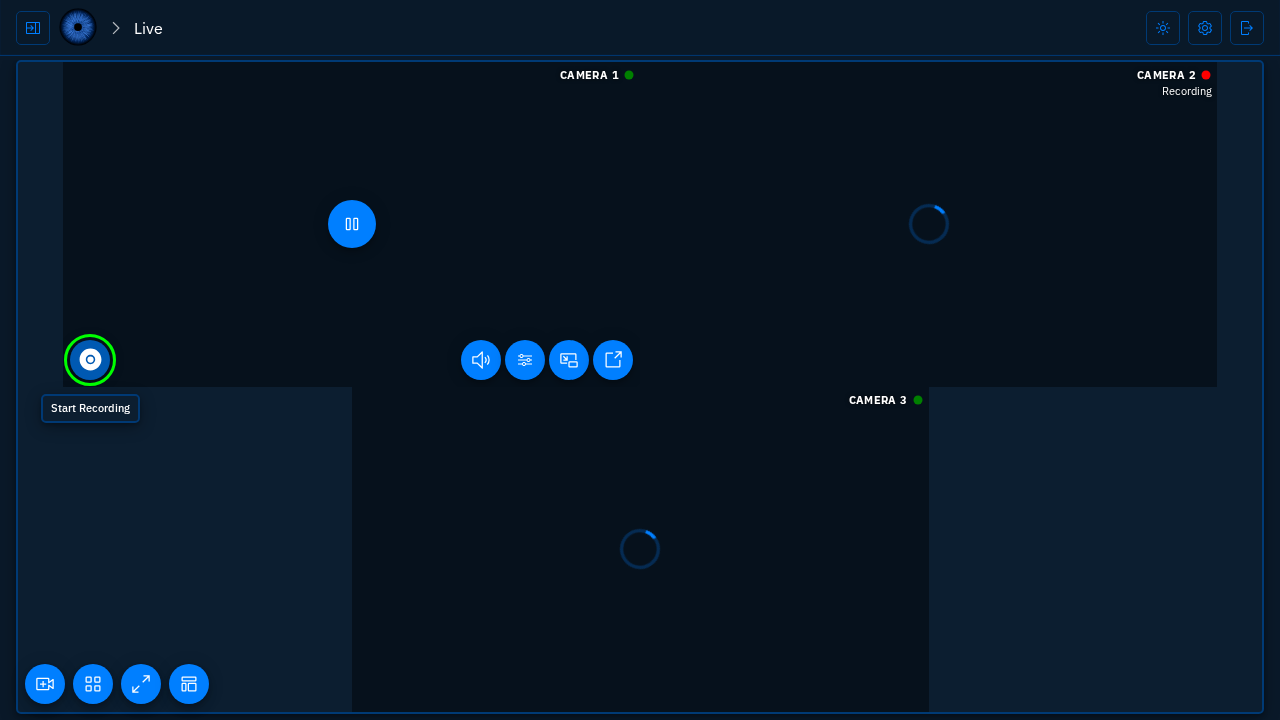
When you want to stop the recording, simply click the Stop Recording button that appears in place of the Record button.
REST API
To start a manual recording using the REST API, send a POST request to the /api/v1/camera/<camera identifier>/manual_recording endpoint with the following JSON payload:
{
  "action": "start",
  "duration": 60 // Optional, duration in seconds
}
To stop it, send a POST request to the same endpoint with the JSON payload:
{
  "action": "stop"
}
Telegram component
To start a manual recording using the Telegram component, you first need to select the camera you want to record by using the /select command.
Then, you can start a manual recording by sending the /record <duration> command, where <duration> is the optional duration in seconds.
To stop the recording, send the /stop_recorder command.
MQTT component
To start a manual recording using the MQTT component, publish a message to the <MQTT client id>/toggle/<camera identifier>_manual_recording/command topic with the following JSON payload:
{
  "action": "start",
  "duration": 60 // Optional, duration in seconds
}
To stop it, publish a message to the same topic with the JSON payload:
{
  "action": "stop"
}
For a default configuration with the camera identifier camera1 the topic would be viseron/toggle/camera1_manual_recording/command.
Retention rules
There are a number of ways to control the retention of recordings.
Storage tiers can be used to move recordings to different storage locations based on age or size.
See the storage component tiers documentation for more information.
Manual recordings follow the same retention rules as event recordings.
Setting retention rules for all cameras
To use the same retention rules for all cameras it is recommended to use the storage component.
Size based retention rules are calculated per camera, meaning that if you have 2 cameras and set a max_size of 1 GB, each camera can store 1 GB of recordings for a total of 2 GB.
Example configuration to set retention rules for all cameras:
storage:
  recorder:
    tiers:
      - path: / # Video segments will be stored in the /segments directory
        events:
          max_age:
            days: 14
        continuous:
          max_size:
            gb: 10
This will enable continuous recordings for all cameras. If you want to disable continuous recordings for a specific camera, you can set continuous_recording: false in the cameras recorder configuration.
Setting retention rules for a specific camera
You can set retention rules for a specific camera by adding the events, continuous or storage key to the camera config.
Example configuration to set retention rules for a specific camera:
- Event
- Continuous
- Storage
ffmpeg: # or any other camera component
  camera:
    camera_one:
      name: Camera 1
      host: !secret camera_one_host
      path: /Streaming/Channels/101/
      username: !secret camera_one_username
      password: !secret camera_one_password
      recorder: # Store only events for 14 days
        events:
          max_age:
            days: 14
ffmpeg: # or any other camera component
  camera:
    camera_one:
      name: Camera 1
      host: !secret camera_one_host
      path: /Streaming/Channels/101/
      username: !secret camera_one_username
      password: !secret camera_one_password
      recorder: # Store 10gb of continuous recordings
        continuous:
          max_size:
            gb: 10
ffmpeg: # or any other camera component
  camera:
    camera_one:
      name: Camera 1
      host: !secret camera_one_host
      path: /Streaming/Channels/101/
      username: !secret camera_one_username
      password: !secret camera_one_password
      storage: # Store events for 14 days and 10gb of continuous recordings
        recorder:
          tiers:
            - path: / # Video segments will be stored in the /segments directory
              events:
                max_age:
                  days: 14
              continuous:
                max_size:
                  gb: 10
File format
The recordings are saved in short .m4s (aka fMP4 or fragmented MP4) segments.
In the web interface the recordings are played back using HLS and the hls.js library.
When you request a recording in the web interface, the server API will generate an HLS playlist and serve the segments to the client.
The recordings are not playable on their own since they are fragmented. If you want to play the recordings outside of the web interface you will need to download the recordings.
Alternatively you can point your media player to the HLS playlist URL (the same used by the web interface), but this is currently not documented.
Downloading recordings
From the web interface you can download recordings to an .mp4 file.
Downloading an event recording
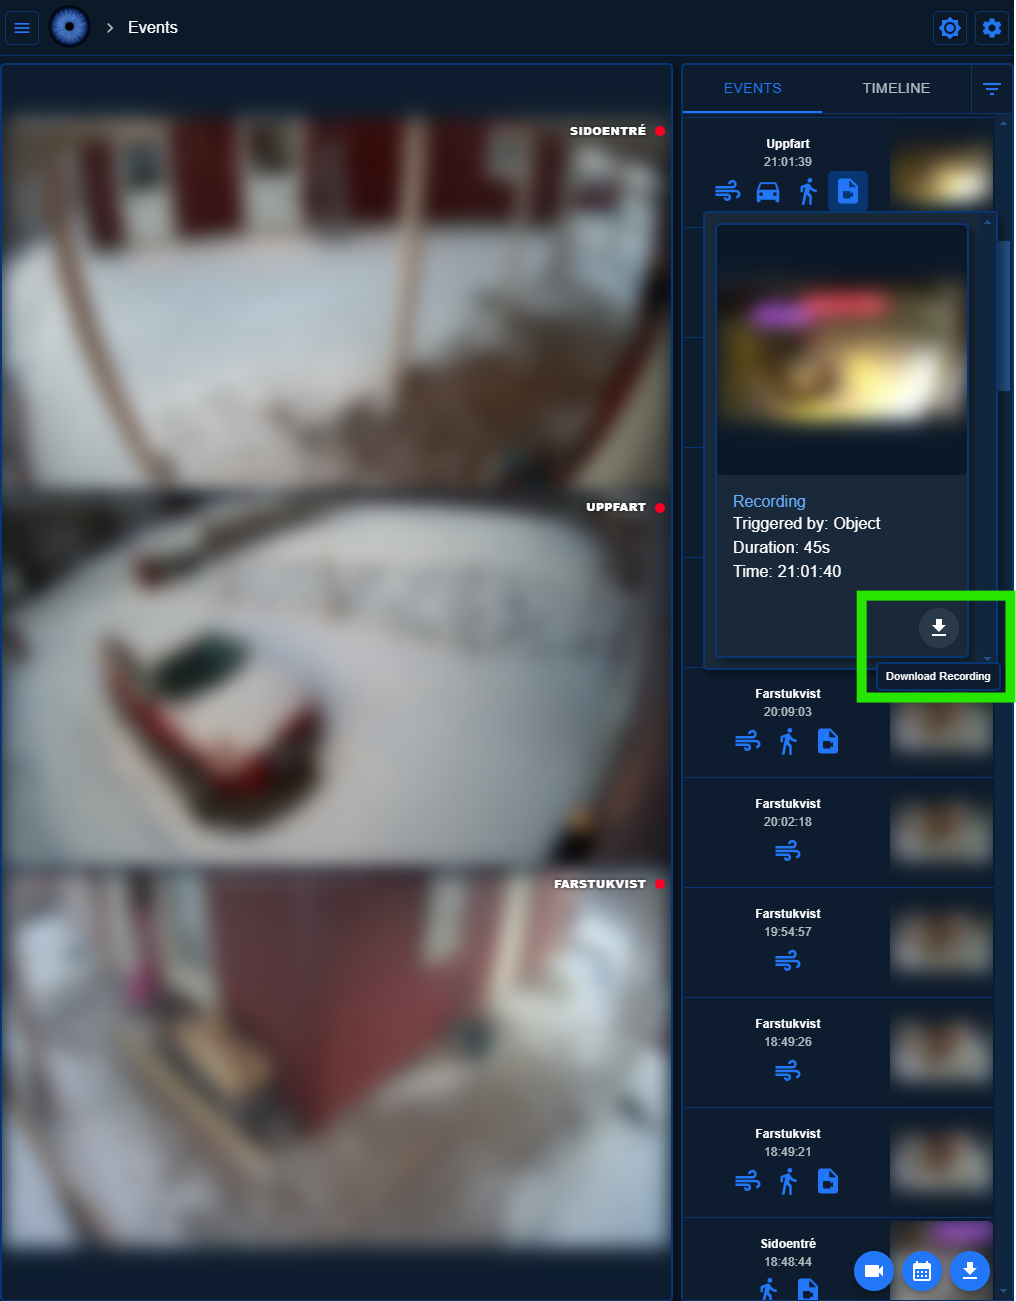
To download an event recording, you use the Download Recording button in the event details popup on the Events tab. It will download the selected event to an .mp4 file.
Downloading a continuous recording
By using the Download button on the Events or Timeline tab you can download a continuous recording. It will download the selected time range to an .mp4 file.
If you have multiple cameras selected, one file per camera will be downloaded.
Create MP4 files for all event recordings
If you want to create .mp4 files for all event recordings you can use the create_event_clip configuration option.
ffmpeg: # or any other camera component
  camera:
    camera_one:
      name: Camera 1
      host: !secret camera_one_host
      path: /Streaming/Channels/101/
      username: !secret camera_one_username
      password: !secret camera_one_password
      recorder:
        create_event_clip: true
This will create .mp4 files for all event recordings, which will be stored in addition to the .m4s files.
THe .mp4 files will be created in the /event_clips directory, unless you have set a different path in the storage component.
Events page query parameters
The Events page supports a number of query parameters to control the behavior of the page.
The following query parameters are supported:
tab: The tab to show. This can beeventsortimeline.camera: The camera identifier of the camera to show.date: The date to show, in the formatYYYY-MM-DD.timestamp: The timestamp to seek to. This is a Unix timestamp in seconds.
Example URL to show the timeline for camera camera_one and seek to the timestamp 1745001300:
http://localhost:8888/#/events?tab=timeline&camera=camera_one×tamp=1745001300